Table of Contents
Toggle[vc_row kd_background_image_position=”vc_row-bg-position-top” css=”.vc_custom_1661216998004{margin-top: 2rem !important;}”][vc_column][vc_separator][vc_column_text css=”.vc_custom_1761382208293{margin-top: 1rem !important;}”]
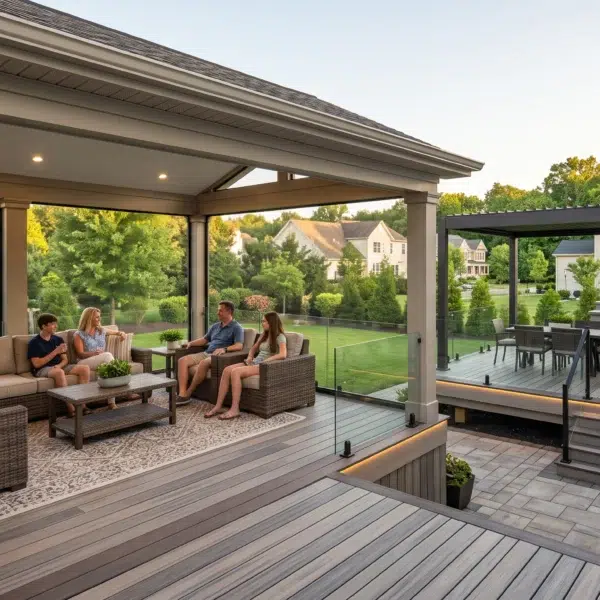
How to Build a Simple DIY Deck
Aspiring deck builders face several important decisions when planning their deck. From choosing decking material to budgeting for the project, careful preparation is key. Building a deck usually costs from $3,000 and higher, depending on the size and complexity, but with proper planning, this investment can add significant value to your home. You’ll also need to secure the appropriate permits from your local government, following local building codes to ensure safety and compliance.
If you’re learning how to build a deck frame, it’s essential to understand the full process, including safety practices, proper tool use, and timing your build, especially given recent material shortages. Starting with a stable surface and clear plan sets the foundation for a successful project. Even a small deck can transform your yard into a functional outdoor space if built correctly.
[/vc_column_text][vc_text_separator title=”Deck Guardian” color=”custom” border_width=”2″ accent_color=”#2196f3″][/vc_column][/vc_row][vc_row kd_background_image_position=”vc_row-bg-position-top” css=”.vc_custom_1668224929240{margin-top: 3rem !important;}” el_class=”d-flex-center”][vc_column width=”1/6″ el_class=”blog-step-left-side” offset=”vc_col-xs-2″][vc_column_text css=”.vc_custom_1668225247578{background-color: #2196f3 !important;}” el_class=”number-square”]Step 1[/vc_column_text][/vc_column][vc_column width=”5/6″][vc_column_text css=””]
Installing Deck Stairs with Precision
When building deck stairs, starting with accurate measurements is critical. Use a story pole to mark exact riser height for each step, ensuring uniformity throughout the staircase. The total rise of your deck should be divided evenly across your stair risers, and using a speed square or framing square will help confirm all angles are precise. Place your first stringer and outside stringers carefully, then add a middle stringer for additional support if your stair width exceeds four feet. A stable surface is essential before you attach the stringers with a strong tie or deck screws.
Cutting and Attaching Stair Stringers
Once your stringers are cut, double-check stair width and riser board placement. Using a circular saw for cutting, make sure each bottom of the stringer is level with the ground. Secure rim joist and rim board before attaching the stringers. Consider using a sledgehammer, speed square, stakes, and square hammer jig to ensure alignment. When attaching stringers, always pre-drill holes and use the recommended number of deck screws, such as two deck screws per joint for standard loads or three more deck screws for added strength.
Installing Stair Treads and Risers
With the stringers in place, you can install stair treads and risers. Use pressure-treated lumber or composite decking for durability, and ensure each tread has a uniform tread depth. Use deck screws to secure deck stair treads, and make sure your bottom riser and top tread are level. Measure twice and cut once — accurate measurements prevent uneven steps that could create a tripping hazard. If using composite decking, make sure to follow the manufacturer’s recommendations for spacing and expansion gaps.
Adding Safety Features and Railing
Safety is paramount when finishing deck stairs. Install railing posts at the top and bottom of the staircase, ensuring stair railing is sturdy and meets local building codes. Attach newel posts and bottom rail securely, then add balusters evenly spaced to prevent accidents. Using expert tips, ensure landing points are solid, bottom tread and top tread are even, and the railing is well-secured with deck screws or lag bolts. A properly installed railing completes a safe, functional, and visually appealing staircase.
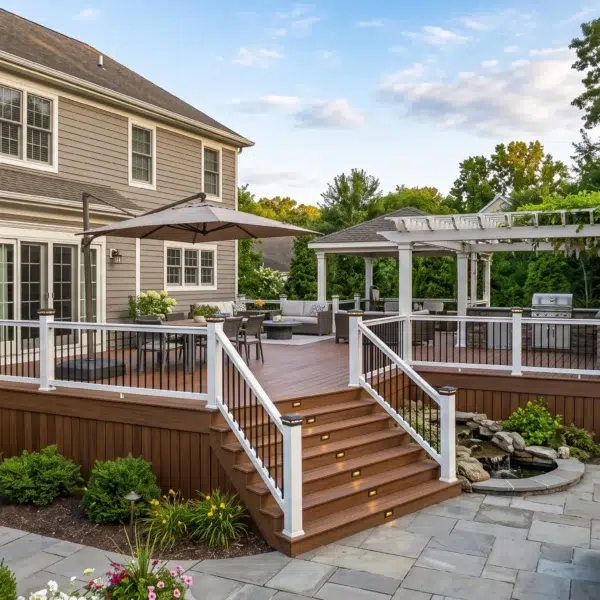
Finishing Touches for a Functional Outdoor Space
Finally, check your deck stairs for alignment, level, and spacing. Add any remaining deck boards to fill gaps or extend the staircase. Incorporate a modern look by choosing high-quality decking material and complementary finishes. Your functional outdoor space is now complete, ready for entertaining or relaxing. Document your project for your next project, noting any lessons learned, and your small deck or large staircase will provide years of safe, enjoyable use.
Take the Measurements and Cut the Ledger
[/vc_column_text][vc_text_separator title=”” color=”custom” accent_color=”#9bcbf2″][/vc_column][/vc_row][vc_row kd_background_image_position=”vc_row-bg-position-top”][vc_column][vc_row_inner kd_background_image_position=”vc_row-bg-position-top”][vc_column_inner][vc_column_text css=””]
Before beginning, carefully measure your ledger, the rim board attached to your house that supports the deck frame. Using a bubble level, mark your lines for accurate alignment. Set your circular saw to the proper siding depth and cut according to your measurements. Any areas the saw doesn’t reach can be finished with a hammer and chisel.
For the ledger, use pressure-treated lumber to resist weather damage. Accurate measurements here are essential for stair width, proper stair rise, and alignment of stair stringers later on. Cutting the ledger correctly ensures your deck stairs and deck frame will be level, safe, and compliant with building codes.
[/vc_column_text][vc_single_image image=”13626″ img_size=”full” add_caption=”yes” onclick=”link_image”][vc_zigzag color=”custom” custom_color=”#2196f3″][/vc_column_inner][/vc_row_inner][/vc_column][/vc_row][vc_row kd_background_image_position=”vc_row-bg-position-top” css=”.vc_custom_1668224929240{margin-top: 3rem !important;}” el_class=”d-flex-center”][vc_column width=”1/6″ el_class=”blog-step-left-side” offset=”vc_col-xs-2″][vc_column_text css=”.vc_custom_1668225678578{background-color: #2196f3 !important;}” el_class=”number-square”]Step 2[/vc_column_text][/vc_column][vc_column width=”5/6″][vc_column_text css=””]
Fix the Ledger to the House Structure
[/vc_column_text][vc_text_separator title=”” color=”custom” accent_color=”#9bcbf2″][/vc_column][/vc_row][vc_row kd_background_image_position=”vc_row-bg-position-top”][vc_column][vc_row_inner kd_background_image_position=”vc_row-bg-position-top”][vc_column_inner][vc_single_image image=”13627″ img_size=”full” alignment=”center”][vc_column_text css=””]
Once the ledger is cut, install metal flashing to protect against water seepage. Secure it with nails, avoiding attachment to house studs. Drill pilot holes for lag screws, ensuring two holes per stud. Once screws are installed and tightened with a ratchet wrench, seal around them with exterior-grade caulk.
This step is critical to prevent water infiltration and provides a solid foundation for the rest of the deck frame, including rim joists, deck boards, and stair stringers. Proper attachment here avoids common deck building mistakes that could compromise the deck’s structural integrity.
[/vc_column_text][vc_text_separator title=”” color=”custom” accent_color=”#9bcbf2″][/vc_column_inner][/vc_row_inner][/vc_column][/vc_row][vc_row kd_background_image_position=”vc_row-bg-position-top” css=”.vc_custom_1668224929240{margin-top: 3rem !important;}” el_class=”d-flex-center”][vc_column width=”1/6″ el_class=”blog-step-left-side” offset=”vc_col-xs-2″][vc_column_text css=”.vc_custom_1668226498519{background-color: #2196f3 !important;}” el_class=”number-square”]Step 3[/vc_column_text][/vc_column][vc_column width=”5/6″][vc_column_text css=””]
Measure and Mark Post Footing Locations
[/vc_column_text][vc_text_separator title=”” color=”custom” accent_color=”#9bcbf2″][/vc_column][/vc_row][vc_row kd_background_image_position=”vc_row-bg-position-top”][vc_column][vc_row_inner kd_background_image_position=”vc_row-bg-position-top”][vc_column_inner][vc_column_text css=””]
Mark your deck’s footings using batter boards and mason lines. Place batter boards around the deck perimeter, connecting them with mason line to define exact footing positions. Use a plumb bob at each cross point to ensure precision. This preparation guarantees your deck stairs and stair treads will be level and evenly spaced.
Proper stair rise and stair width depend on careful measurements at this stage. Without this step, your deck stair treads may end up uneven, leading to safety issues.
[/vc_column_text][vc_single_image image=”13628″ img_size=”full” alignment=”center”][vc_text_separator title=”” color=”custom” accent_color=”#9bcbf2″][/vc_column_inner][/vc_row_inner][/vc_column][/vc_row][vc_row kd_background_image_position=”vc_row-bg-position-top” css=”.vc_custom_1668224929240{margin-top: 3rem !important;}” el_class=”d-flex-center”][vc_column width=”1/6″ el_class=”blog-step-left-side” offset=”vc_col-xs-2″][vc_column_text css=”.vc_custom_1668226602310{background-color: #2196f3 !important;}” el_class=”number-square”]Step 4[/vc_column_text][/vc_column][vc_column width=”5/6″][vc_column_text css=””]
Dig and Pour Footings
[/vc_column_text][vc_text_separator title=”” color=”custom” accent_color=”#9bcbf2″][/vc_column][/vc_row][vc_row kd_background_image_position=”vc_row-bg-position-top”][vc_column][vc_row_inner kd_background_image_position=”vc_row-bg-position-top”][vc_column_inner][vc_column_text css=””]
Excavate holes for each footing to comply with local building codes. Add a base of loose gravel, insert concrete tubes, and pour concrete to the required depth. Place J-bolts while the concrete is wet, ensuring threaded sides are upright for post attachment. This secures a stable surface for the deck and deck stairs.
[/vc_column_text][vc_single_image image=”13629″ img_size=”full” alignment=”center”][vc_text_separator title=”” color=”custom” accent_color=”#9bcbf2″][/vc_column_inner][/vc_row_inner][/vc_column][/vc_row][vc_row kd_background_image_position=”vc_row-bg-position-top” css=”.vc_custom_1668224929240{margin-top: 3rem !important;}” el_class=”d-flex-center”][vc_column width=”1/6″ el_class=”blog-step-left-side” offset=”vc_col-xs-2″][vc_column_text css=”.vc_custom_1668227035622{background-color: #2196f3 !important;}” el_class=”number-square”]Step 5[/vc_column_text][/vc_column][vc_column width=”5/6″][vc_column_text css=””]
Attach and Fix the Posts
[/vc_column_text][vc_text_separator title=”” color=”custom” accent_color=”#9bcbf2″][/vc_column][/vc_row][vc_row kd_background_image_position=”vc_row-bg-position-top”][vc_column][vc_row_inner kd_background_image_position=”vc_row-bg-position-top”][vc_column_inner][vc_column_text css=””]
Place metal post anchors over J-bolts and attach bottom newel posts or six-by-six wooden posts cut to size. Plumb each post carefully and secure with stakes or scrap lumber. Mark cut points for water drainage, ensuring a slight slope for runoff.
Newel posts are vital for stair stability and railing support. Accurate placement here ensures your stair railing and bottom rail will be level, providing a safe and visually appealing finish.
[/vc_column_text][vc_single_image image=”13630″ img_size=”full” alignment=”center”][vc_text_separator title=”” color=”custom” accent_color=”#9bcbf2″][/vc_column_inner][/vc_row_inner][/vc_column][/vc_row][vc_row kd_background_image_position=”vc_row-bg-position-top” css=”.vc_custom_1668224929240{margin-top: 3rem !important;}” el_class=”d-flex-center”][vc_column width=”1/6″ el_class=”blog-step-left-side” offset=”vc_col-xs-2″][vc_column_text css=”.vc_custom_1668227420811{background-color: #2196f3 !important;}” el_class=”number-square”]Step 6[/vc_column_text][/vc_column][vc_column width=”5/6″][vc_column_text css=””]
Cut and Install Beams
[/vc_column_text][vc_text_separator title=”” color=”custom” accent_color=”#9bcbf2″][/vc_column][/vc_row][vc_row kd_background_image_position=”vc_row-bg-position-top”][vc_column][vc_row_inner kd_background_image_position=”vc_row-bg-position-top”][vc_column_inner][vc_column_text css=””]
Prepare beams by laminating two-by-eights with construction glue and nails. Attach them to the posts using saddle hardware and galvanized screws. Ensure proper alignment with rim joist and rim board to support the deck frame. A middle stringer is recommended for wider stairs to prevent sagging.
[/vc_column_text][vc_single_image image=”13631″ img_size=”full” alignment=”center”][vc_text_separator title=”” color=”custom” accent_color=”#9bcbf2″][/vc_column_inner][/vc_row_inner][/vc_column][/vc_row][vc_row kd_background_image_position=”vc_row-bg-position-top” css=”.vc_custom_1668224929240{margin-top: 3rem !important;}” el_class=”d-flex-center”][vc_column width=”1/6″ el_class=”blog-step-left-side” offset=”vc_col-xs-2″][vc_column_text css=”.vc_custom_1668227454090{background-color: #2196f3 !important;}” el_class=”number-square”]Step 7[/vc_column_text][/vc_column][vc_column width=”5/6″][vc_column_text css=””]
Install Header and Flooring Joists
[/vc_column_text][vc_text_separator title=”” color=”custom” accent_color=”#9bcbf2″][/vc_column][/vc_row][vc_row kd_background_image_position=”vc_row-bg-position-top”][vc_column][vc_row_inner kd_background_image_position=”vc_row-bg-position-top”][vc_column_inner][vc_column_text css=””]
Attach header joists to outer joists using joist hangers. Ensure the frame is square by measuring diagonal lines. Install flooring joists at 16-inch intervals using a framing square for precision. These joists will hold deck boards and support stair stringers.
[/vc_column_text][vc_single_image image=”13632″ img_size=”full” alignment=”center”][vc_text_separator title=”” color=”custom” accent_color=”#9bcbf2″][/vc_column_inner][/vc_row_inner][/vc_column][/vc_row][vc_row kd_background_image_position=”vc_row-bg-position-top” css=”.vc_custom_1668224929240{margin-top: 3rem !important;}” el_class=”d-flex-center”][vc_column width=”1/6″ el_class=”blog-step-left-side” offset=”vc_col-xs-2″][vc_column_text css=”.vc_custom_1668229036970{background-color: #2196f3 !important;}” el_class=”number-square”]Step 8[/vc_column_text][/vc_column][vc_column width=”5/6″][vc_column_text css=””]
Attach Floorboards
[/vc_column_text][vc_text_separator title=”” color=”custom” accent_color=”#9bcbf2″][/vc_column][/vc_row][vc_row kd_background_image_position=”vc_row-bg-position-top”][vc_column][vc_row_inner kd_background_image_position=”vc_row-bg-position-top”][vc_column_inner][vc_column_text css=””]Dry-fit deck boards to determine spacing. Attach each board with deck screws, leaving a small gap for expansion. Cut final boards with a circular saw as needed to fit rim joists. This ensures your deck surface is even and structurally sound.[/vc_column_text][vc_single_image image=”13633″ img_size=”full” alignment=”center”][vc_text_separator title=”” color=”custom” accent_color=”#9bcbf2″][/vc_column_inner][/vc_row_inner][/vc_column][/vc_row][vc_row kd_background_image_position=”vc_row-bg-position-top” css=”.vc_custom_1668224929240{margin-top: 3rem !important;}” el_class=”d-flex-center”][vc_column width=”1/6″ el_class=”blog-step-left-side” offset=”vc_col-xs-2″][vc_column_text css=”.vc_custom_1668229354599{background-color: #2196f3 !important;}” el_class=”number-square”]Step 9[/vc_column_text][/vc_column][vc_column width=”5/6″][vc_column_text css=””]
Build and Fix the Staircase
[/vc_column_text][vc_text_separator title=”” color=”custom” accent_color=”#9bcbf2″][/vc_column][/vc_row][vc_row kd_background_image_position=”vc_row-bg-position-top”][vc_column][vc_row_inner kd_background_image_position=”vc_row-bg-position-top”][vc_column_inner][vc_column_text css=””]
Cut stair stringers to size, ensuring consistent stair risers and tread thickness. Install stair treads and riser boards, securing them with deck screws. Use speed squares, square hammer jig, and marking paint for accuracy. Properly attach first stringer, middle stringer, and outside stringers to support safe stair use.
Consider exact riser height, tread depth, and stair width when spacing treads. A step by step approach prevents mistakes and ensures compliance with building codes.
[/vc_column_text][vc_single_image image=”13634″ img_size=”full” alignment=”center”][vc_text_separator title=”” color=”custom” accent_color=”#9bcbf2″][/vc_column_inner][/vc_row_inner][/vc_column][/vc_row][vc_row kd_background_image_position=”vc_row-bg-position-top” css=”.vc_custom_1668224929240{margin-top: 3rem !important;}” el_class=”d-flex-center”][vc_column width=”1/6″ el_class=”blog-step-left-side” offset=”vc_col-xs-2″][vc_column_text css=”.vc_custom_1668229478864{background-color: #2196f3 !important;}” el_class=”number-square”]Step 10[/vc_column_text][/vc_column][vc_column width=”5/6″][vc_column_text css=””]
Build Your Deck Railing
[/vc_column_text][vc_text_separator title=”” color=”custom” accent_color=”#9bcbf2″][/vc_column][/vc_row][vc_row kd_background_image_position=”vc_row-bg-position-top”][vc_column][vc_row_inner kd_background_image_position=”vc_row-bg-position-top”][vc_column_inner][vc_column_text css=””]
Cut railing posts to size, attach to deck, and install bottom rail and top cap rail. Use lag screws or three more deck screws to secure posts. Space balusters evenly to meet safety standards. Bottom newel posts and top tread support stability.
[/vc_column_text][vc_single_image image=”13635″ img_size=”full” alignment=”center”][vc_text_separator title=”” color=”custom” accent_color=”#9bcbf2″][/vc_column_inner][/vc_row_inner][/vc_column][/vc_row][vc_row kd_background_image_position=”vc_row-bg-position-top”][vc_column][vc_zigzag color=”custom” custom_color=”#2196f3″][vc_row_inner kd_background_image_position=”vc_row-bg-position-top”][vc_column_inner][vc_column_text css=””]
When to Hire a Professional Deck Builder
DIY projects save money but can be time-consuming. If your deck design is complex or includes features like deck stairs, multiple landings, or intricate railing systems, consider hiring professional deck builders. They ensure proper installation, exact riser height, and compliance with local building codes.
Check out How to Find a Reliable Deck Contractor for guidance. Professionals can help with deck rim, rim board, stair stringers, and other critical components. Call a professional deck builder or get a free estimate to guarantee your deck is safe, functional, and visually appealing.
[/vc_column_text][vc_single_image image=”13262″ img_size=”full” alignment=”center”][/vc_column_inner][/vc_row_inner][/vc_column][/vc_row]